Table of Contents
Working with Media
Summary
Accepted Media File Formats
- Video: MP4, MPG, MPEG, MOV, AVI, M4U, M4V, QT, WEB, WMV, TS, M2TS,3GP, OGG
- Photos & Images: JPG, JPEG, PNG, GIF
- Audio Files: MP3, M4A, WAV
- Documents: PDF, Microsoft Word (DOC, DOCX), Excel (XLS, XLSX), PowerPoint (PPT, PPTX)
- Other (no thumbnails): CSV, JSON, 7Z, RTF, SRT, TXT, PRPROJ, ZIP, BRAW, Keynote (KEY), Numbers (NUMBERS), Pages(PAGES)
We are adding new formats often, try to upload them first and contact us for any issues.
Starting an Upload
Prepare all related media (videos, photos, audio, documents) files to transfer from your device and/or computer. Files to make sure to include might be a company-branded logo in JPG or PNG file type.
For example, if the video is referencing a real estate listing add all related photos or video clips into the project media.
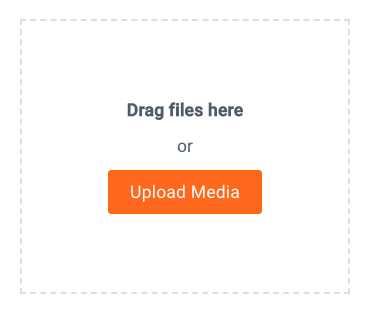
Select two options to upload files:
- Click the upper-right corner of the screen button: Upload Media

- Or use the dedicated Upload Panel has a button: Upload Media or can use the drag-and-drop function from(from your computer only).
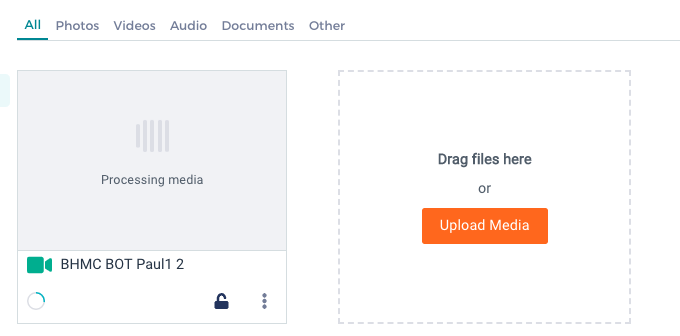
Checking the Status of an Upload
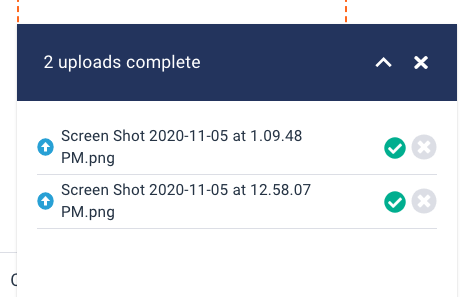
- Once uploading has begun, the bottom right corner will show all current uploads and also displays the status of each upload (for videos it shows the % completed)
- The status can also be seen in the media panel as Processing media
Once completed, you can view all the media items or filter the media by type:
- All, Photos, Videos, Audio, Documents, Other
Potential Upload Errors
If your media upload fails an error will show up in the media file box, the media can be deleted and then repeat the upload steps again. There will be a green check boxes showing successful upload status per item.
Renaming Media for Editors
For the media title, the system automatically removes the extensions and converts underscores to spaces.
For ease of use and for the editors, please rename media files once uploads are completed, to clearly describe the content for script additions.
For example: change "DSC_0123" to "Living Room 1", we recommend creating sequential naming specific to the media
- Simply click the title line on the media item you can change it directly in this field
- Press ENTER or click √ Save at the lower right portion of the screen to save all filename changes
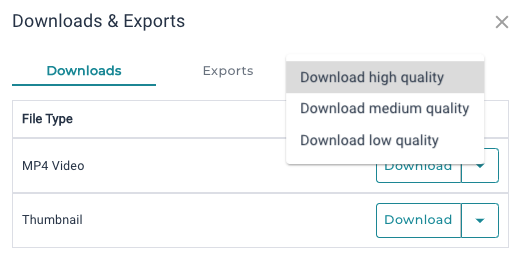
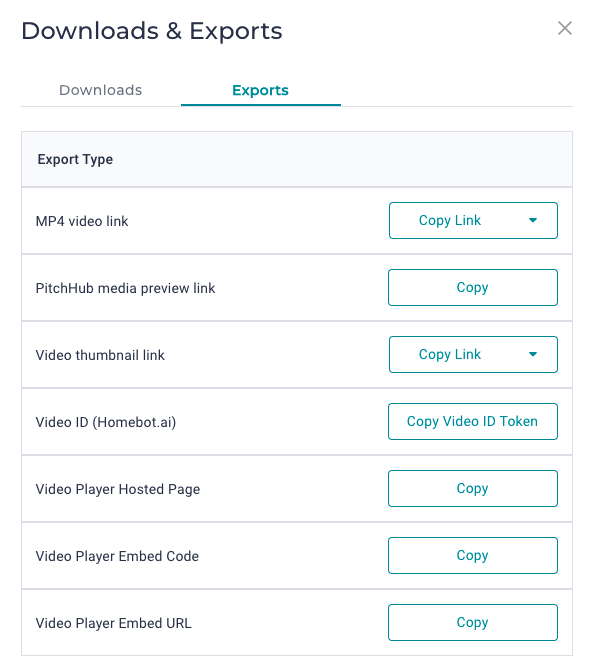
Delete, Download & Export
Once project media is securely uploaded into the project you can choose to delete, download or download and export it. Click the 3 vertical dots under each media file and three options will appear to:
- Delete - You will be asked to confirm each deletion
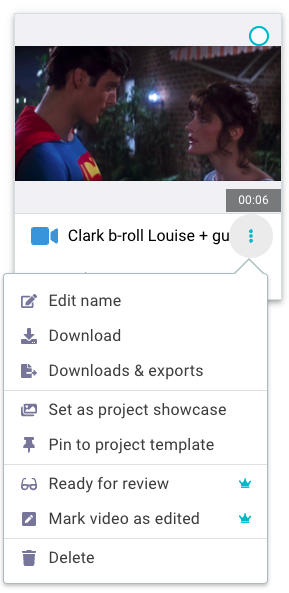
- Download - click it and the file will start to download to your device or computer
- Downloads & Exports - Utilize the Downloads option to download a file to your computer or the Exports option to copy various links to your clipboard, to be pasted elsewhere. Click the down arrow for additional choices of e.g. file quality sizes (high, medium, low)

Additional Features
Paged Documents convert to PNG for each page
- Multi-page documents, such as PowerPoint presentations (PPT) will be converted to individual files for easy downloading as type: PNG
- For example for a 10-page PPT presentation that was uploaded as one document, download the original or download it as 10 separate documents in the PNG file format
- Special Note: the maximum number of pages that will be processed is 50 pages.